We already have our account secured, an IAM user ready, and we understand how policies and roles work. It’s time to get our hands dirty with our first real AWS service: Amazon S3 (Simple Storage Service). S3 is the most widely used storage service in AWS and one of the first ones everyone should know.
What is Amazon S3?
Amazon S3 is an object storage service. Think of it as an infinite hard drive in the cloud where you can store any type of file: images, videos, backups, documents, code, logs, you name it. The difference from a traditional hard drive is that S3 is designed to be highly available (your files are always accessible), durable (AWS guarantees 99.999999999% durability, known as “11 nines”), and scalable (you don’t have to worry about space).
Before we start, there are two key concepts:
- Bucket: the main container where files are stored. Think of it as a root folder. Each bucket has a name that is globally unique across all of AWS (no one else in the world can have a bucket with the same name).
- Object: each file we upload to a bucket. Each object has a key (its name/path within the bucket) and the file content itself.
Tip: Although S3 shows “folders” in the console, technically folders don’t exist. They are simply prefixes in the object name. For example,
photos/vacation/beach.jpgis an object whose key includes the prefixphotos/vacation/.
Step 1: Navigate to the S3 service
From the AWS console, we search for S3 in the top search bar and click on the result.

Step 2: Create a bucket
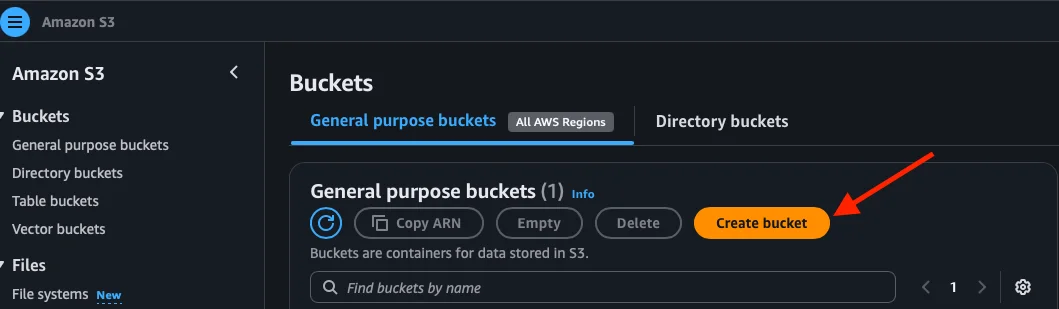
On the main S3 screen, we see the list of buckets (if it’s your first time, it will be empty). We click on Create bucket.
Step 3: Configure the bucket
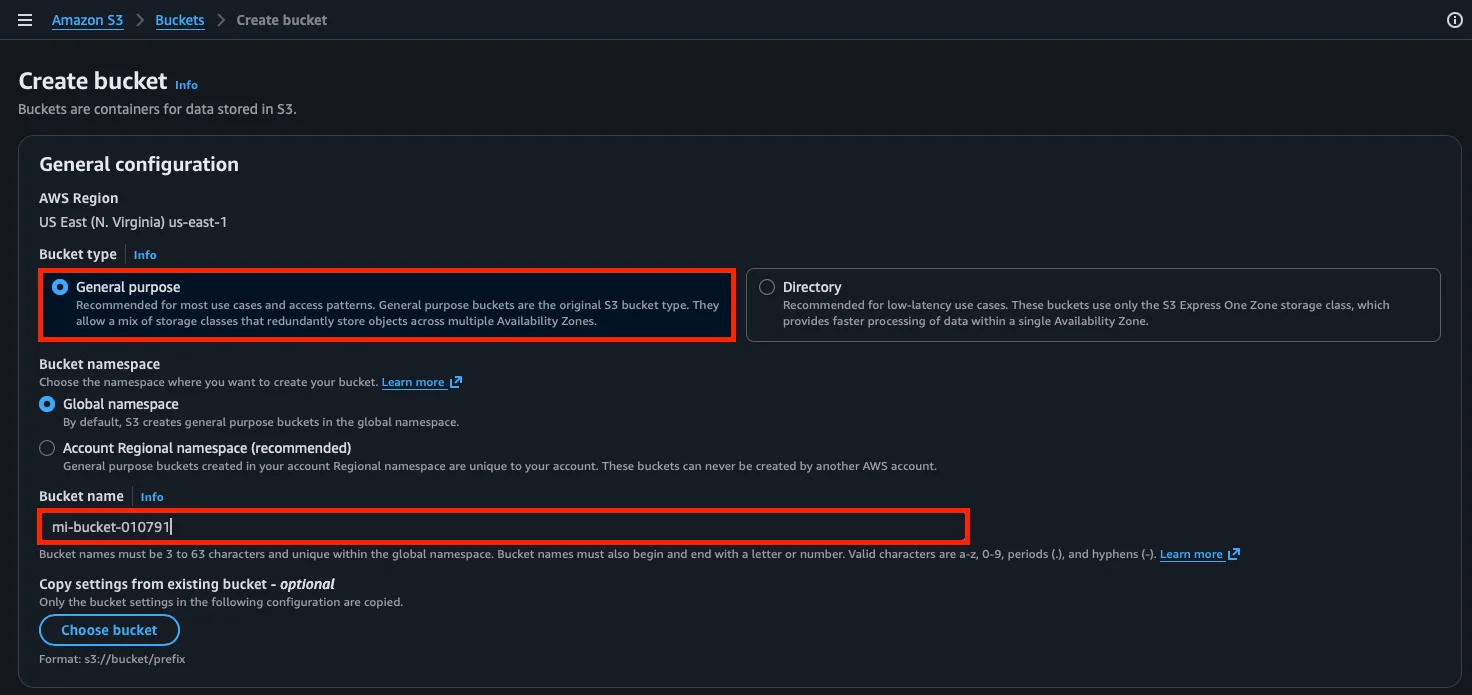
AWS asks us for the bucket details. Let’s go through each section:
- AWS Region: the region where the bucket will be stored. In our case,
US East (N. Virginia) us-east-1is already selected. - Bucket type: we choose General purpose, which is the recommended type for most use cases. The other option (Directory) is for specific low-latency cases with S3 Express One Zone.
- Bucket namespace: we leave Global namespace, which is the default option. This means the bucket name must be unique across all of AWS worldwide.
- Bucket name: a unique name (for example,
mi-bucket-010791). Since the namespace is global, you’ll probably need to add a unique identifier, like random numbers or your initials with a number, to make it available.
Step 4: Public access configuration
Further down, we see the Block Public Access settings for this bucket section. By default, AWS blocks all public access and this is perfect. It’s a very important security measure: no bucket should be public unless we have a very specific reason (like serving a static website).
We leave all the options checked as they are.
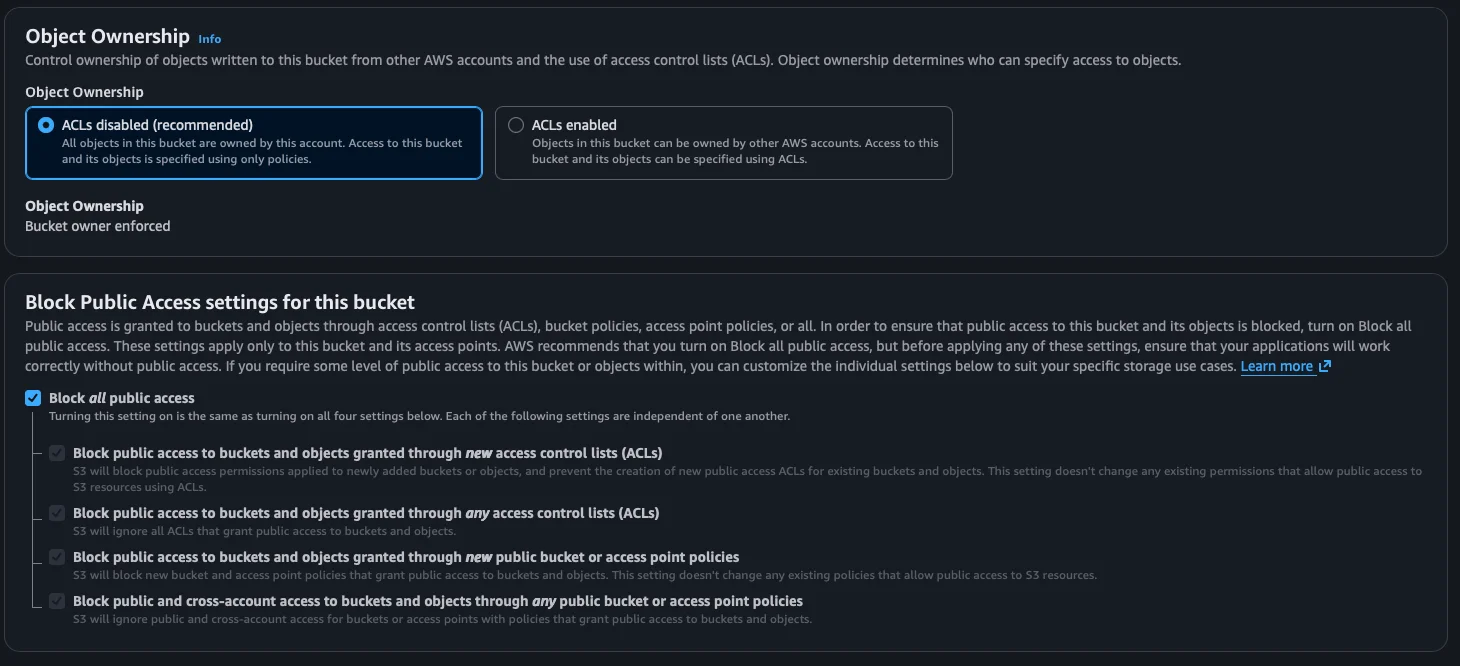
Important: One of the most common security mistakes in AWS is accidentally leaving buckets public. This has caused real data breaches in companies. Always keep the public access block enabled unless you know exactly what you’re doing.
Step 5: Additional options
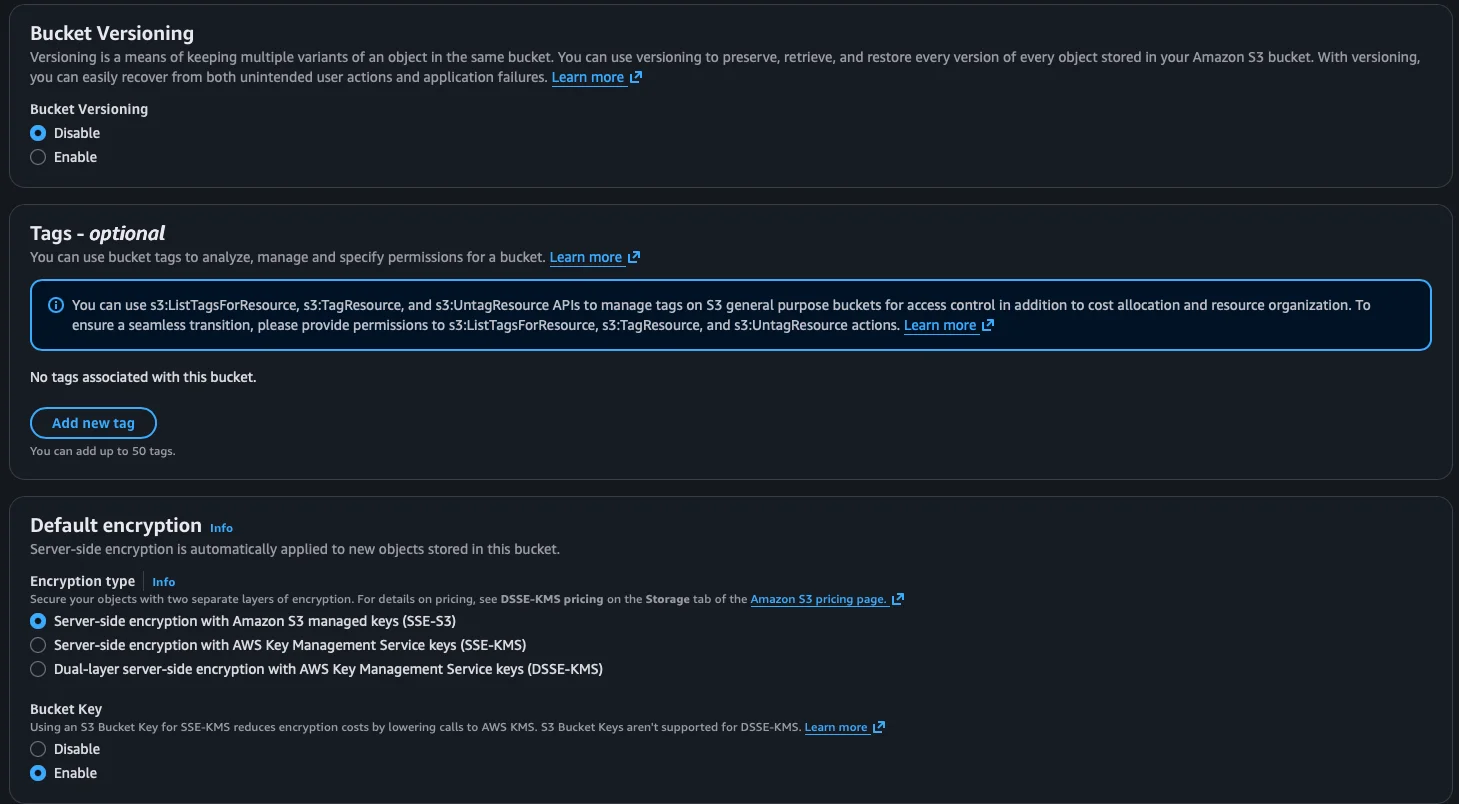
Further down we find several options that we leave with their default values for now:
- Bucket Versioning: we leave it on Disable. Versioning allows keeping multiple versions of the same object, but it’s not necessary to start with.
- Tags: optional labels to organize and control costs. We leave them empty.
- Default encryption: AWS automatically encrypts objects with SSE-S3 (Server-Side Encryption with Amazon S3 managed keys). We leave it as is — it’s the recommended option.
- Bucket Key: we leave it on Enable, which helps reduce encryption costs.
Step 6: Create the bucket
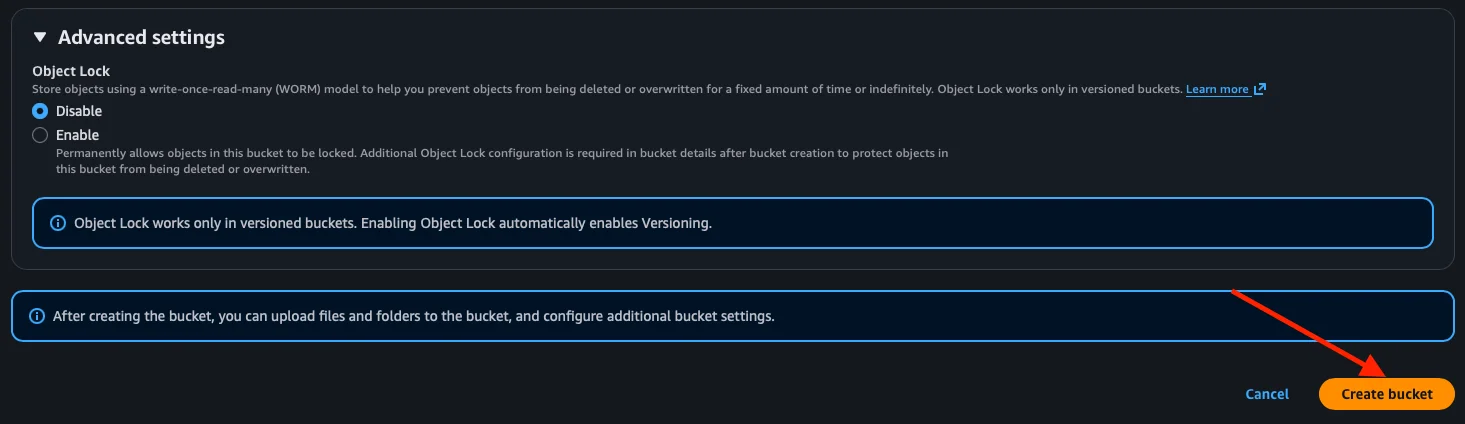
In the Advanced settings section, we leave Object Lock on Disable (it’s for cases where you need objects to be undeletable and unoverwritable, like regulatory compliance).
We click on Create bucket.
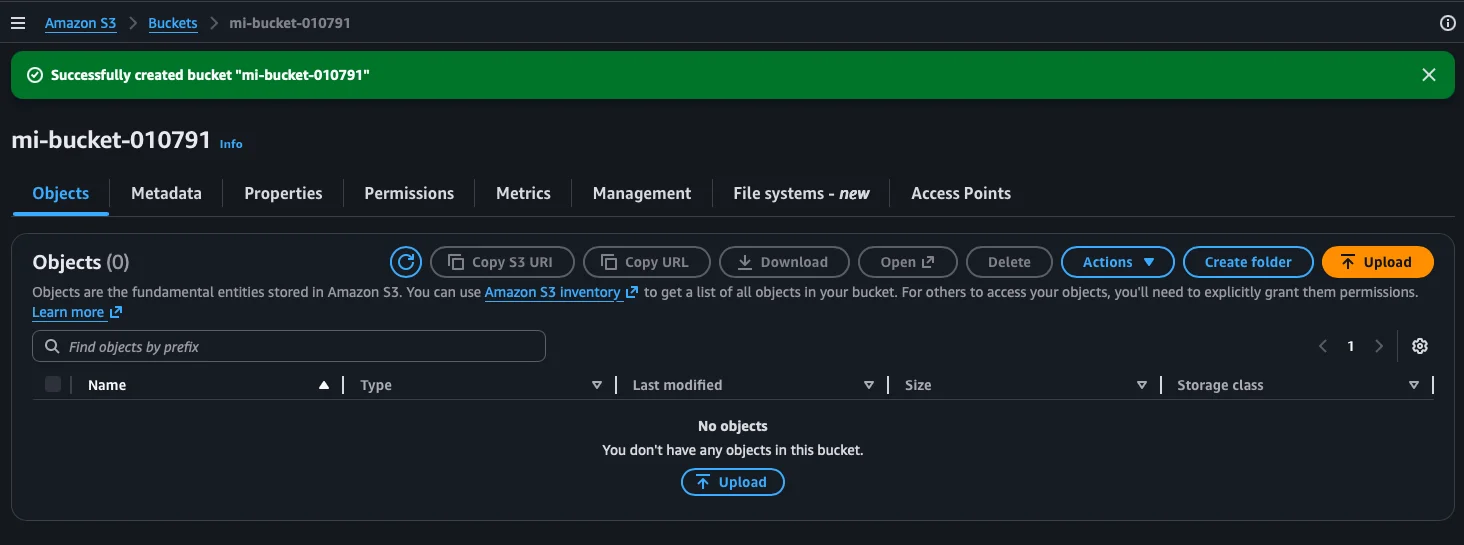
We now have our first bucket created. AWS shows us the confirmation message and takes us directly to the bucket’s interior, which is empty for now.
Step 7: Upload a file to the bucket
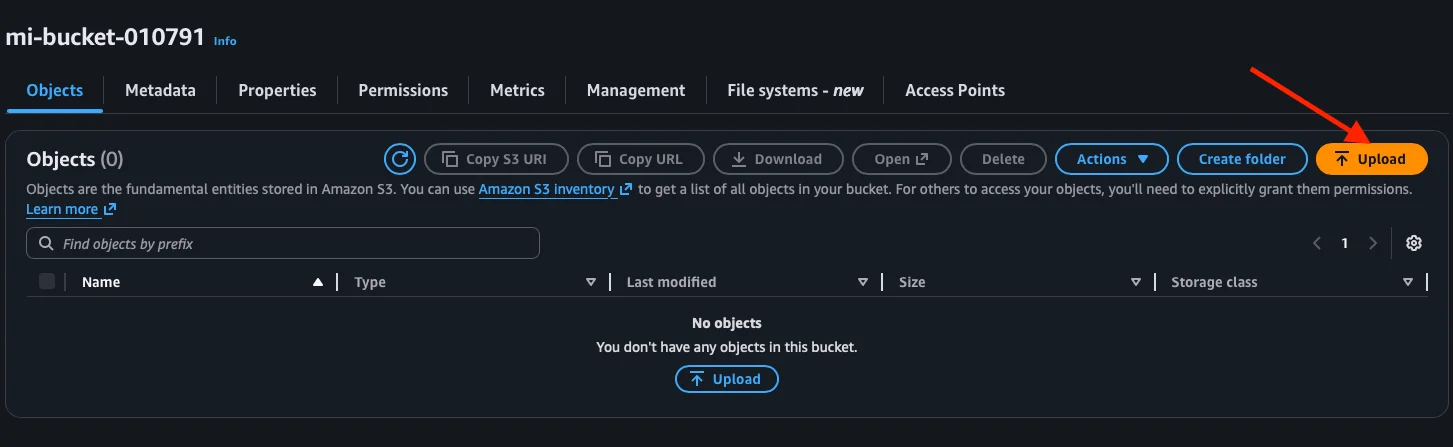
Inside the bucket we see it has no objects. To upload our first file, we click the Upload button.
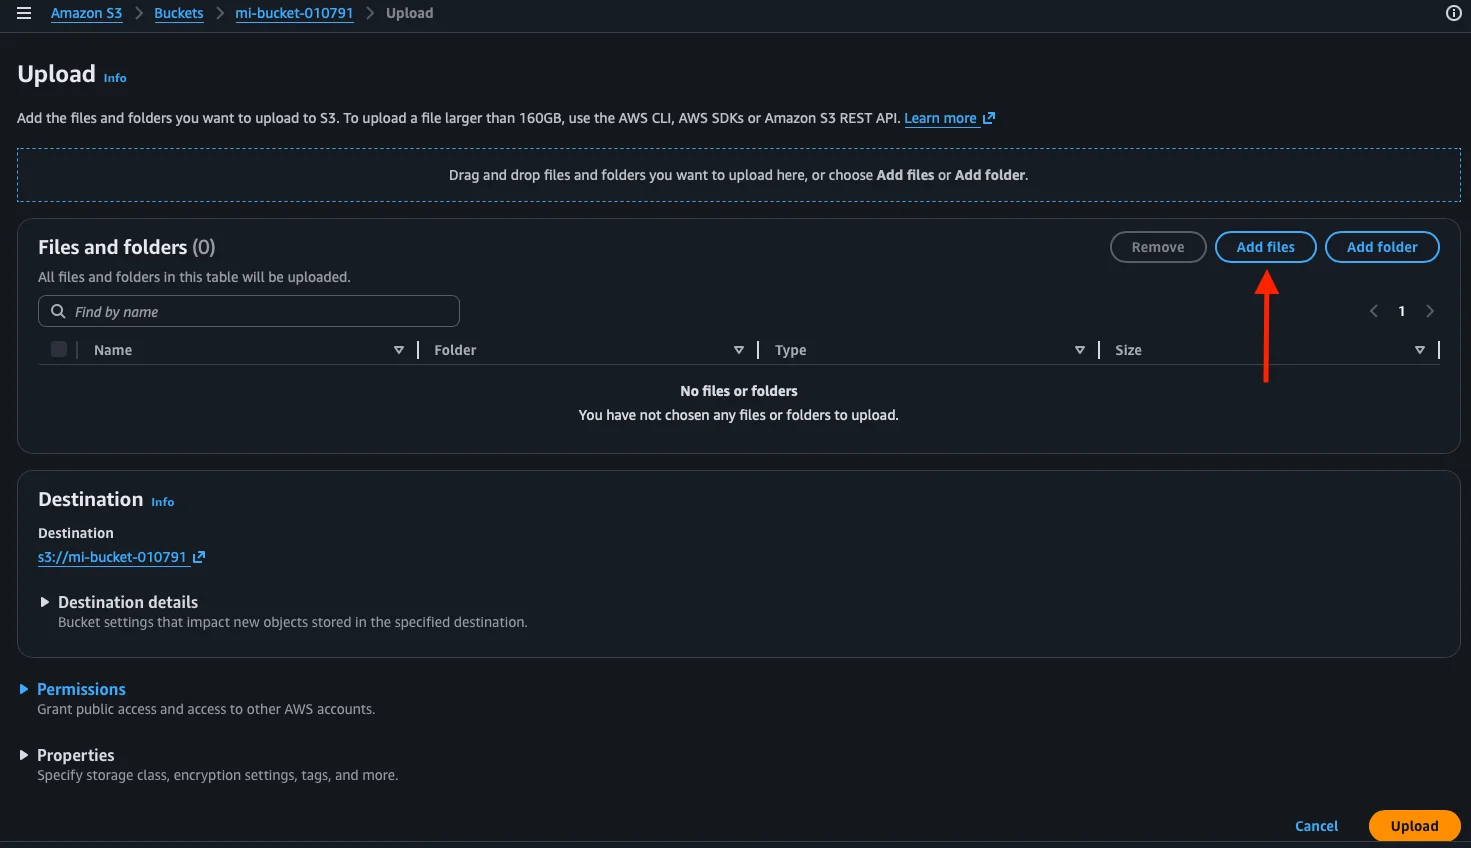
On the Upload screen, we click Add files to select a file from our computer.
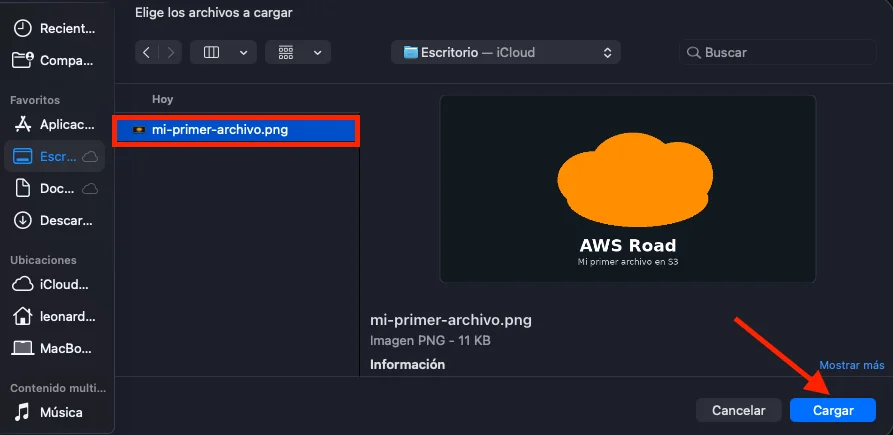
The operating system’s file picker opens. We choose the file we want to upload (in our case, an image called mi-primer-archivo.png) and click Open (or the equivalent button in your system’s language).
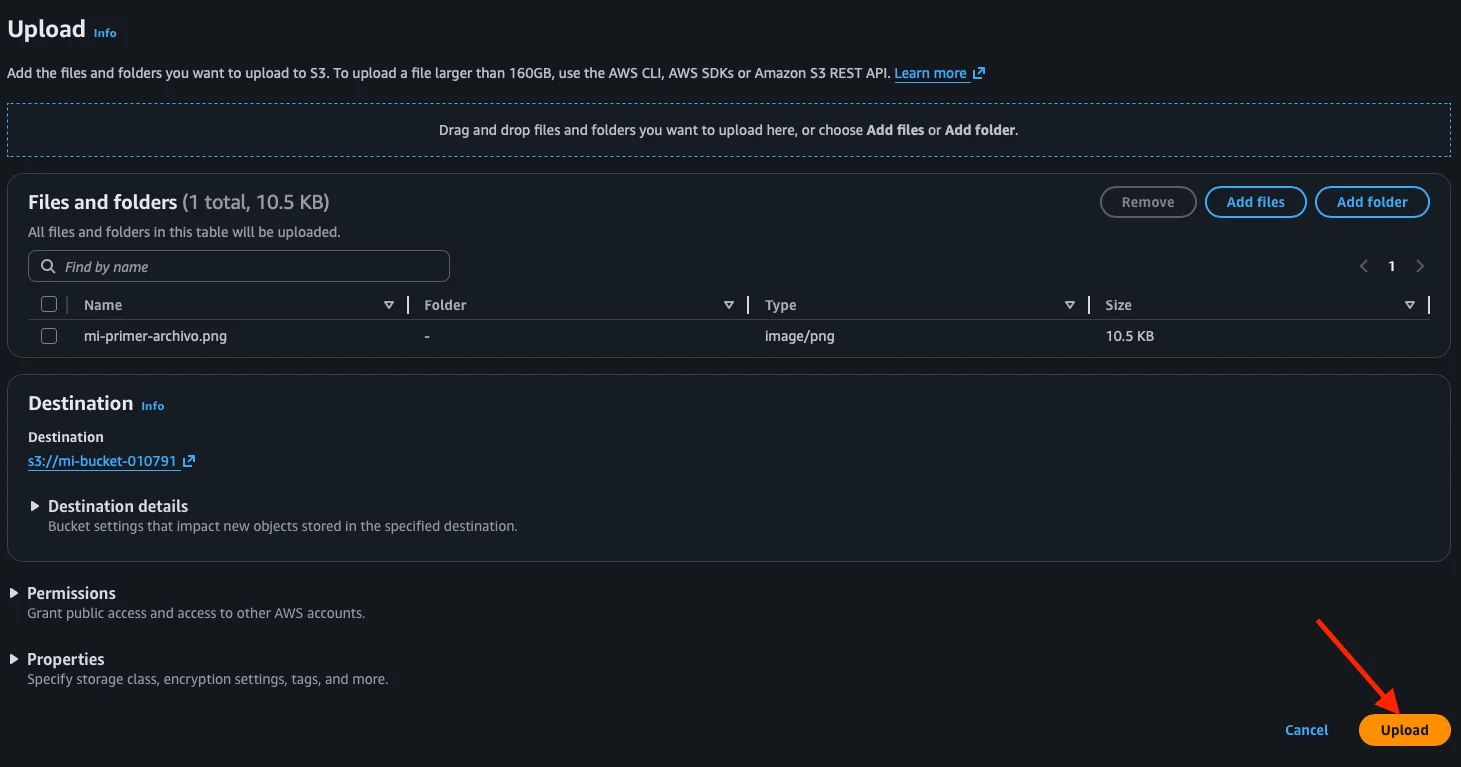
Once selected, we see the file in the list with its name, type, and size. We confirm everything looks good and click Upload.
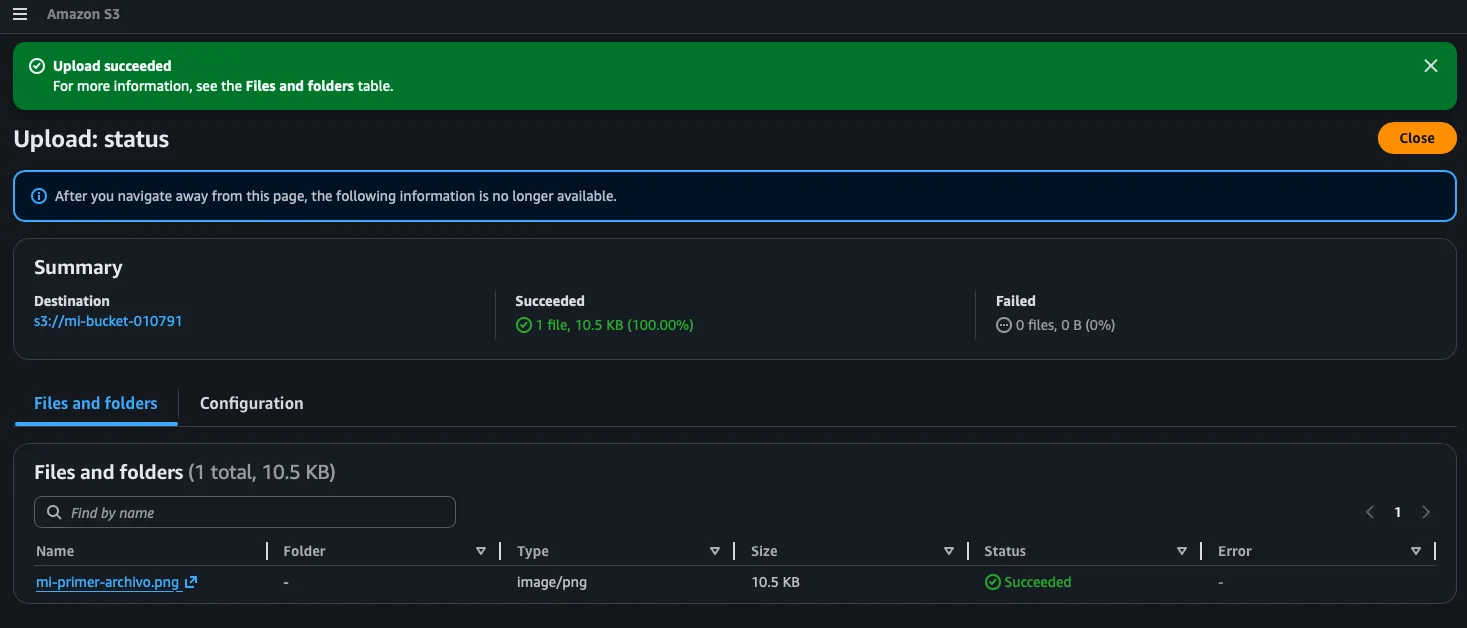
AWS shows us the upload result. If everything went well, we see the green Upload succeeded banner with a summary: destination, number of files uploaded, and the status of each one.
Step 8: View the object and access it
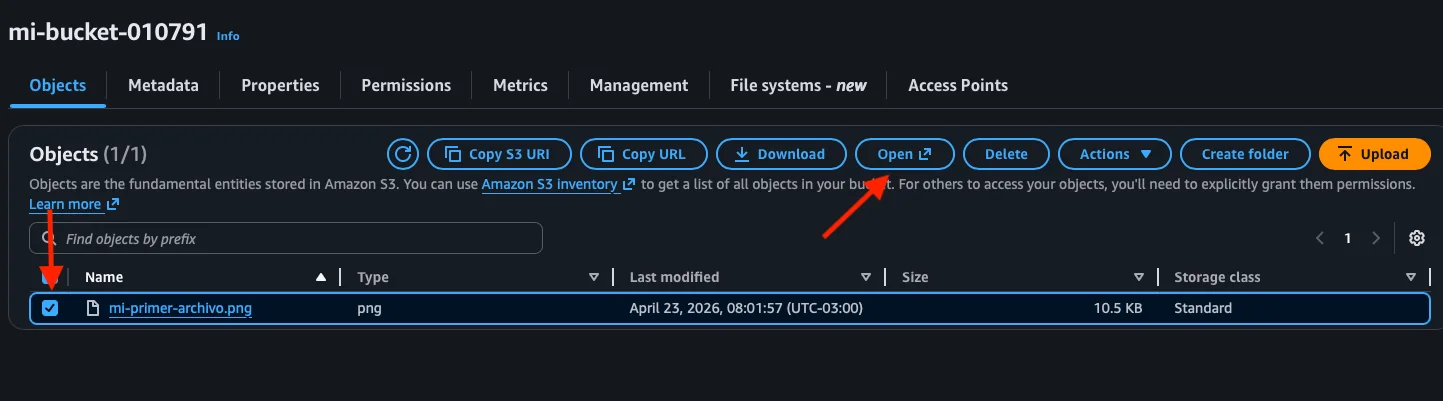
We close the upload screen and go back to the bucket. Now we can see our file mi-primer-archivo.png in the objects list with its type, last modified date, size, and storage class (Standard).
If we select the file (checkbox), the action buttons in the top bar become enabled: Open, Download, Delete, Actions, etc.
If we try to copy the object’s URL and open it directly in the browser, we’ll get an Access Denied error. This is correct and expected: our bucket is private, so no one can access objects through a public URL.
What if I need to share the file? S3 allows generating presigned URLs: temporary URLs with an expiration time that allow accessing an object without making it public. Let’s see it in the next step.
Step 9: Access the object with a Presigned URL
To access the file securely without making the bucket public, we can use the Open button directly from the console. When we click it, AWS automatically generates a temporary presigned URL and opens the file in the browser.
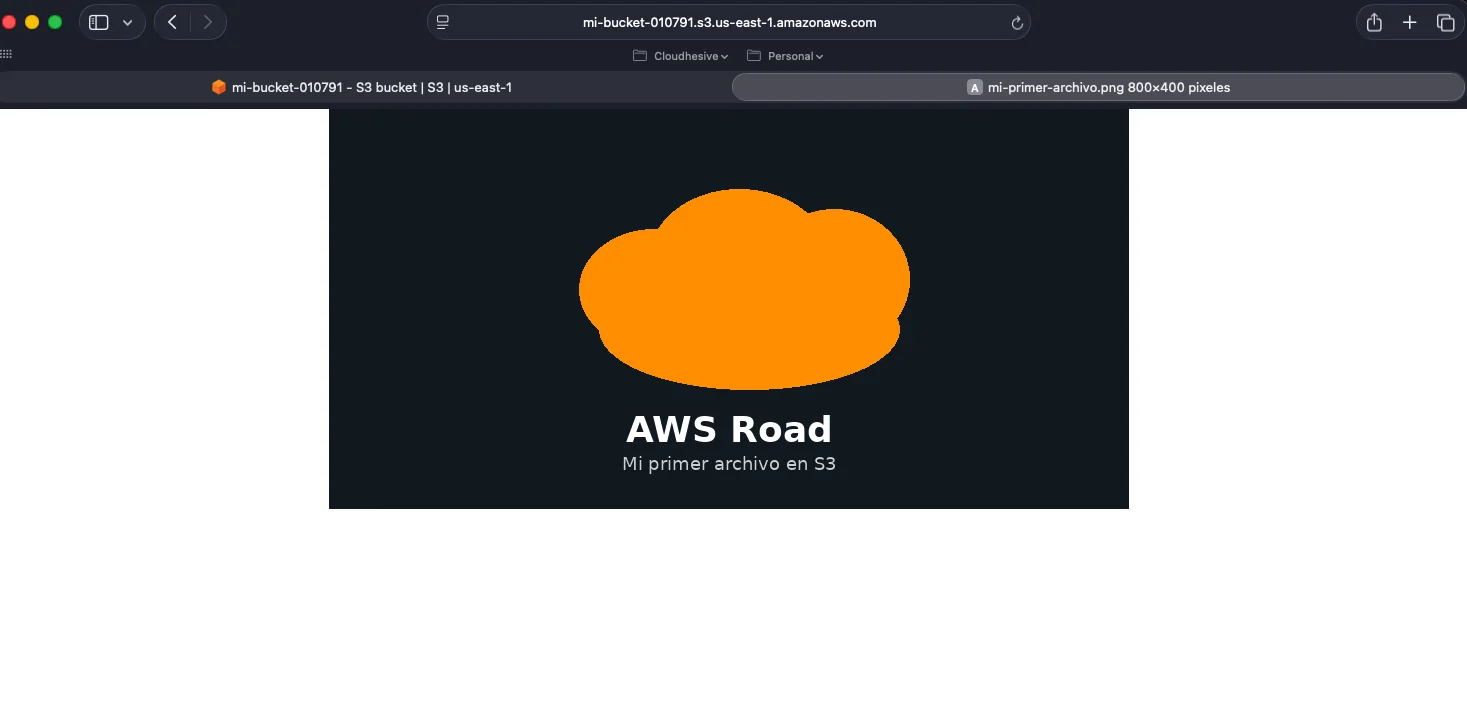
As you can see, the URL in the browser’s address bar points to mi-bucket-010791.s3.us-east-1.amazonaws.com with additional parameters that include temporary credentials and a signature. This URL works only for a limited time — after that, it expires and stops working.
Tip: Presigned URLs are ideal for sharing files temporarily without compromising the bucket’s security. They can also be generated from the Actions → Share with a presigned URL menu, where you can choose the expiration time.
How much does S3 cost?
One of S3’s advantages is that you only pay for what you use. There’s no minimum cost or fixed fee. Costs are calculated by:
- Storage: per GB stored per month.
- Requests: per number of requests (PUT, GET, LIST, etc.).
- Data transfer: data transfer out of AWS has a cost (data transfer in is free).
To give you an idea, storing 1 GB for one month in S3’s standard class costs approximately $0.023 USD (in us-east-1). And within the Free Tier, you get 5 GB of free storage during the first 12 months.
Tip: For this kind of testing with small files, the cost will be practically zero. But it’s always good practice to review the pricing section before using any service.
Connecting with what we learned: Policies and S3
Remember the custom policy we created in the previous post? It was precisely a policy to read objects from a specific S3 bucket:
{
  "Version": "2012-10-17",
  "Statement": [
    {
      "Effect": "Allow",
      "Action": [
        "s3:GetObject",
        "s3:ListBucket"
      ],
      "Resource": [
        "arn:aws:s3:::mi-bucket-010791",
        "arn:aws:s3:::mi-bucket-010791/*"
      ]
    }
  ]
}
Now that we’ve actually created the bucket, that policy has a real resource to act on. If we attached this policy to a user or a role, that user/role could list and read the files in our bucket, but couldn’t upload, modify, or delete them. That’s the principle of least privilege in action.
Conclusions
In this post we took the first practical step with AWS: we created a bucket in Amazon S3, uploaded our first file, and learned how to access objects securely with presigned URLs. We also connected what we learned about policies with a real use case.
In the next post, we’ll see how to configure AWS Budgets to create cost alerts and keep everything under control before continuing to experiment with more services.