If you’re taking your first steps in the Cloud world and you’re going to start with AWS… the first thing you need is an AWS account. In this post, I’ll guide you step by step through the entire registration process, from scratch and at no cost.
Step 1: Go to the AWS website
Open your browser and go to aws.amazon.com. Once on the main page, click the “Create account” button located in the upper right corner.

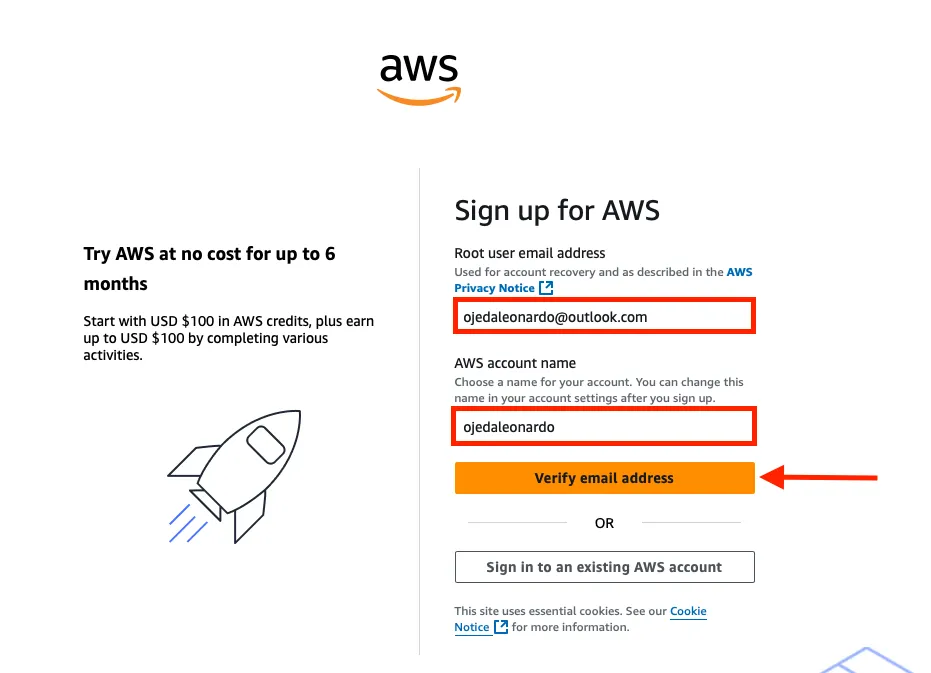
Step 2: Register email and account name
AWS will ask for an email address that will serve as the root user of the account. We also need to enter a name for the AWS account (this name is simply an identifier and can be changed later), then click Verify email address.
Important: The root user email is the most critical access point of the entire account. Use a secure email that you don’t share with anyone.
Step 3: Verify your email
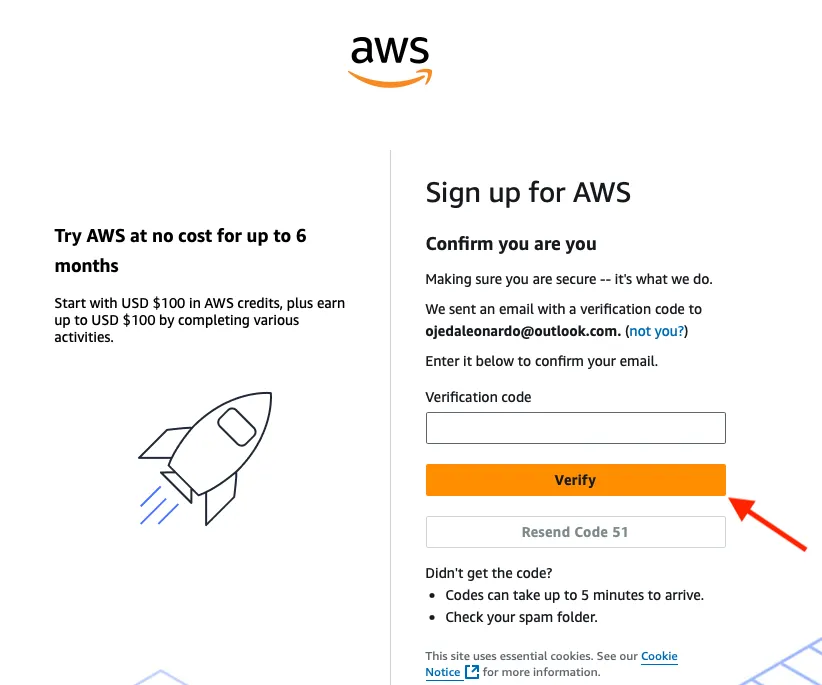
AWS sends a verification code to the email we entered in the previous step. Check your inbox (or spam folder), copy the code and paste it into the form, then click Verify.
Step 4: Create the password
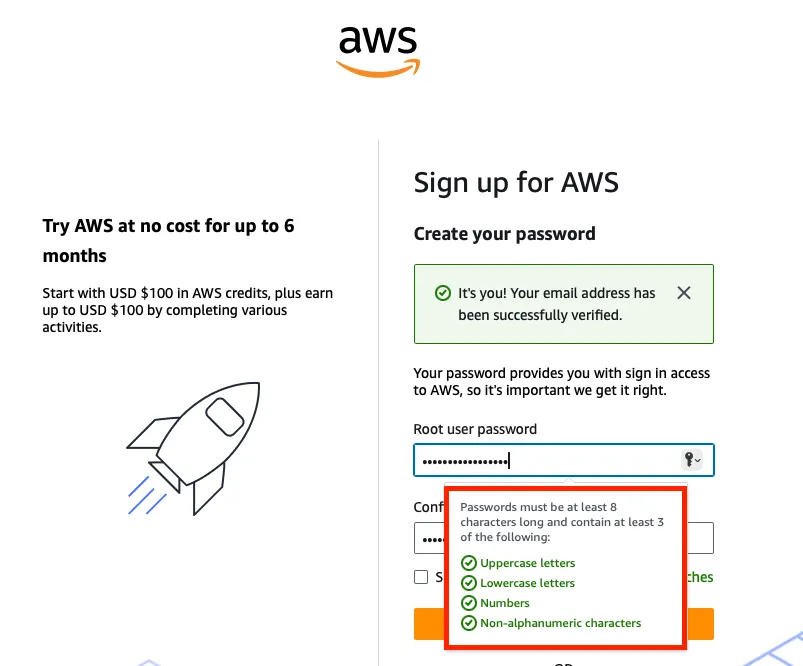
Now we need to create a password for the root user. AWS will require it to meet certain security requirements: uppercase, lowercase, numbers, special characters, and at least 8 characters long.
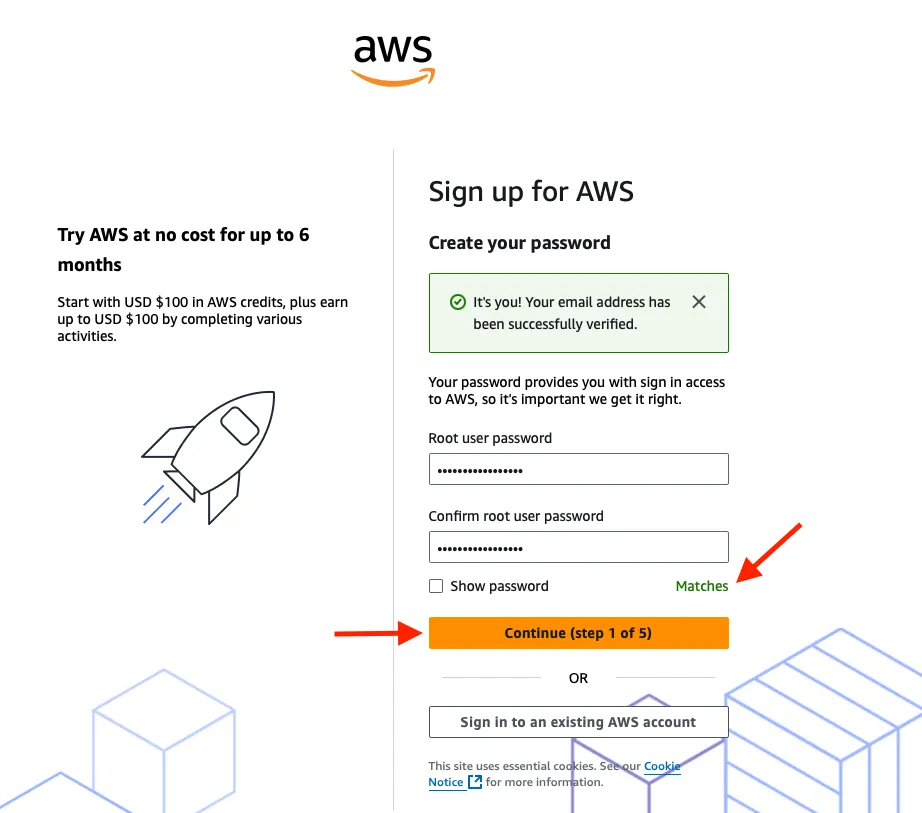
Once the password meets all requirements, we confirm and click “Continue”.
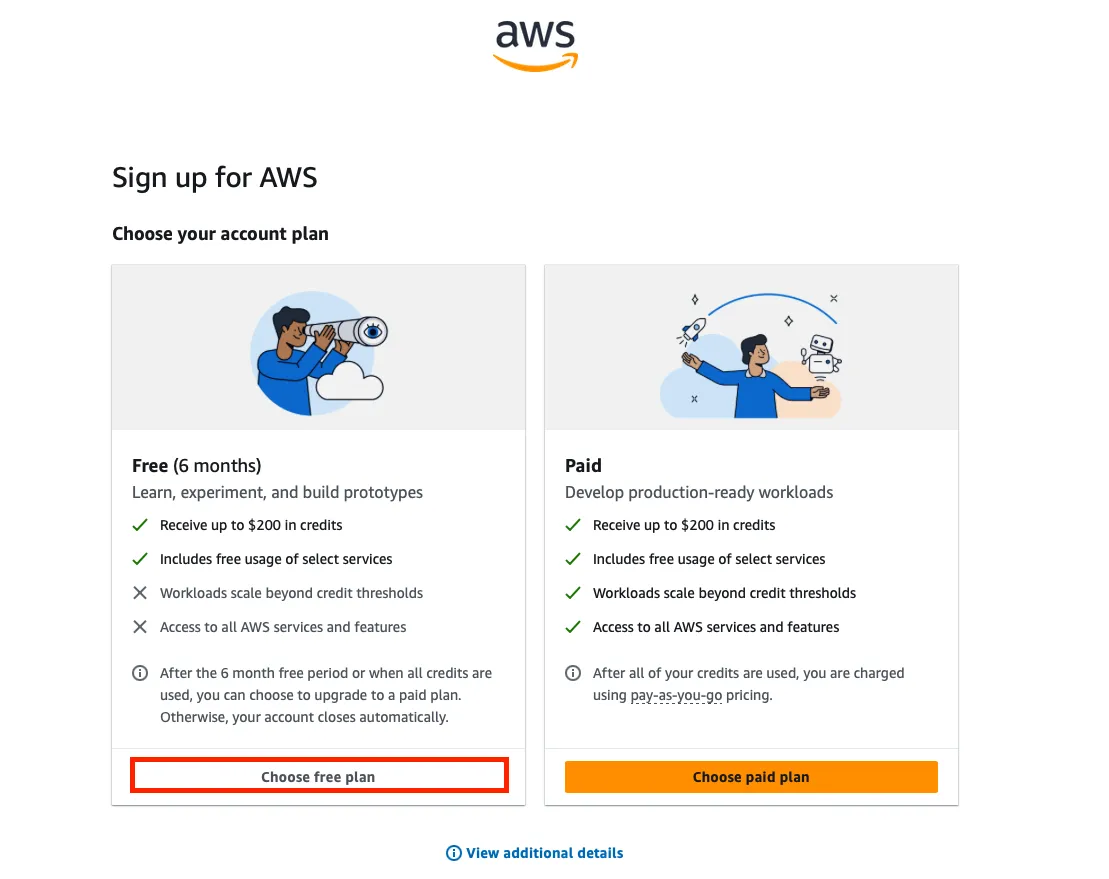
Step 5: Choose the account plan
AWS offers two options: Free and Paid. To get started, we select the “Free” plan which gives us free access for 6 months to a large number of services within the Free Tier, plus up to $200 USD in credits ($100 upon registration and up to $100 more when exploring fundamental AWS services).
With the free plan, we can learn, experiment, and build projects without spending a dime (as long as we stay within the Free Tier limits).
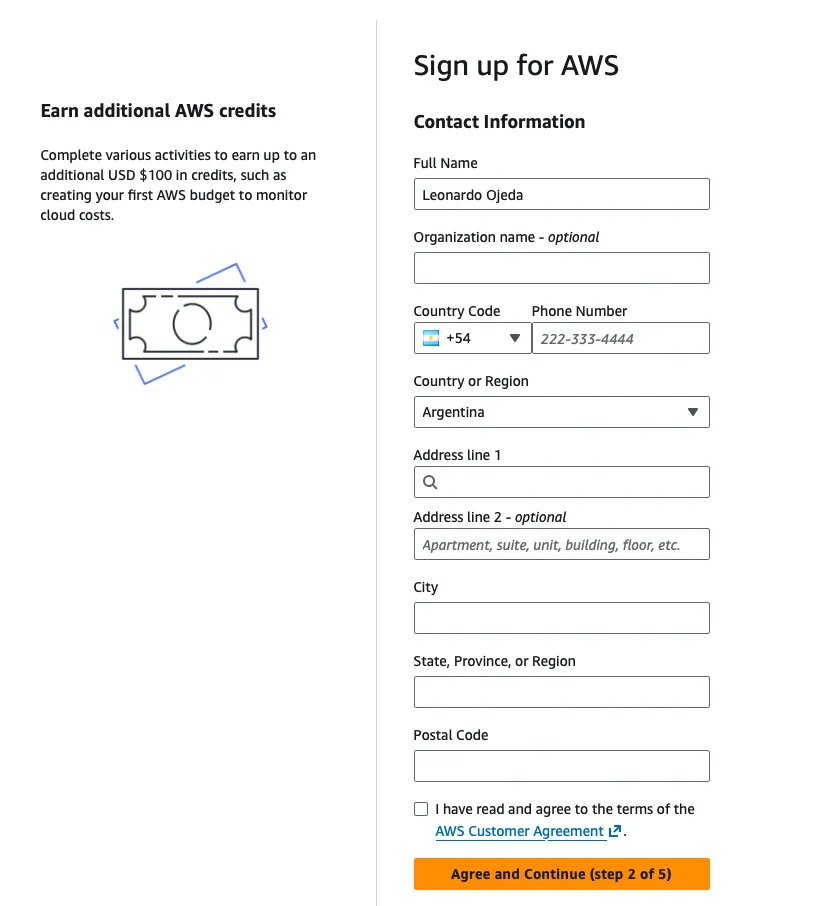
Step 6: Contact information
We fill out the form with our personal details: full name, phone number, country, address, and zip code. We accept the terms and conditions and click Agree and Continue.
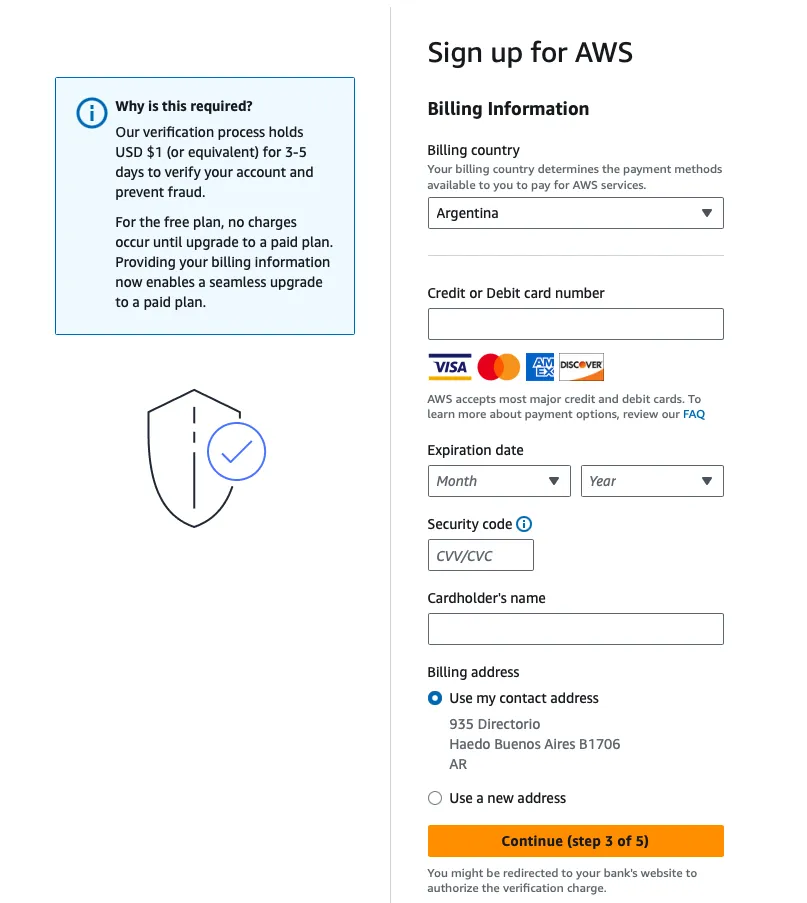
Step 7: Billing information
AWS asks for a credit or debit card to verify our identity. No charges are made upon registration, but it’s a mandatory requirement. AWS may place a temporary hold for a minimal amount (usually USD 1) that is automatically reversed.
Tip: If you’re worried about unexpected charges, later on we’ll see how to set up billing alerts to always stay in control.
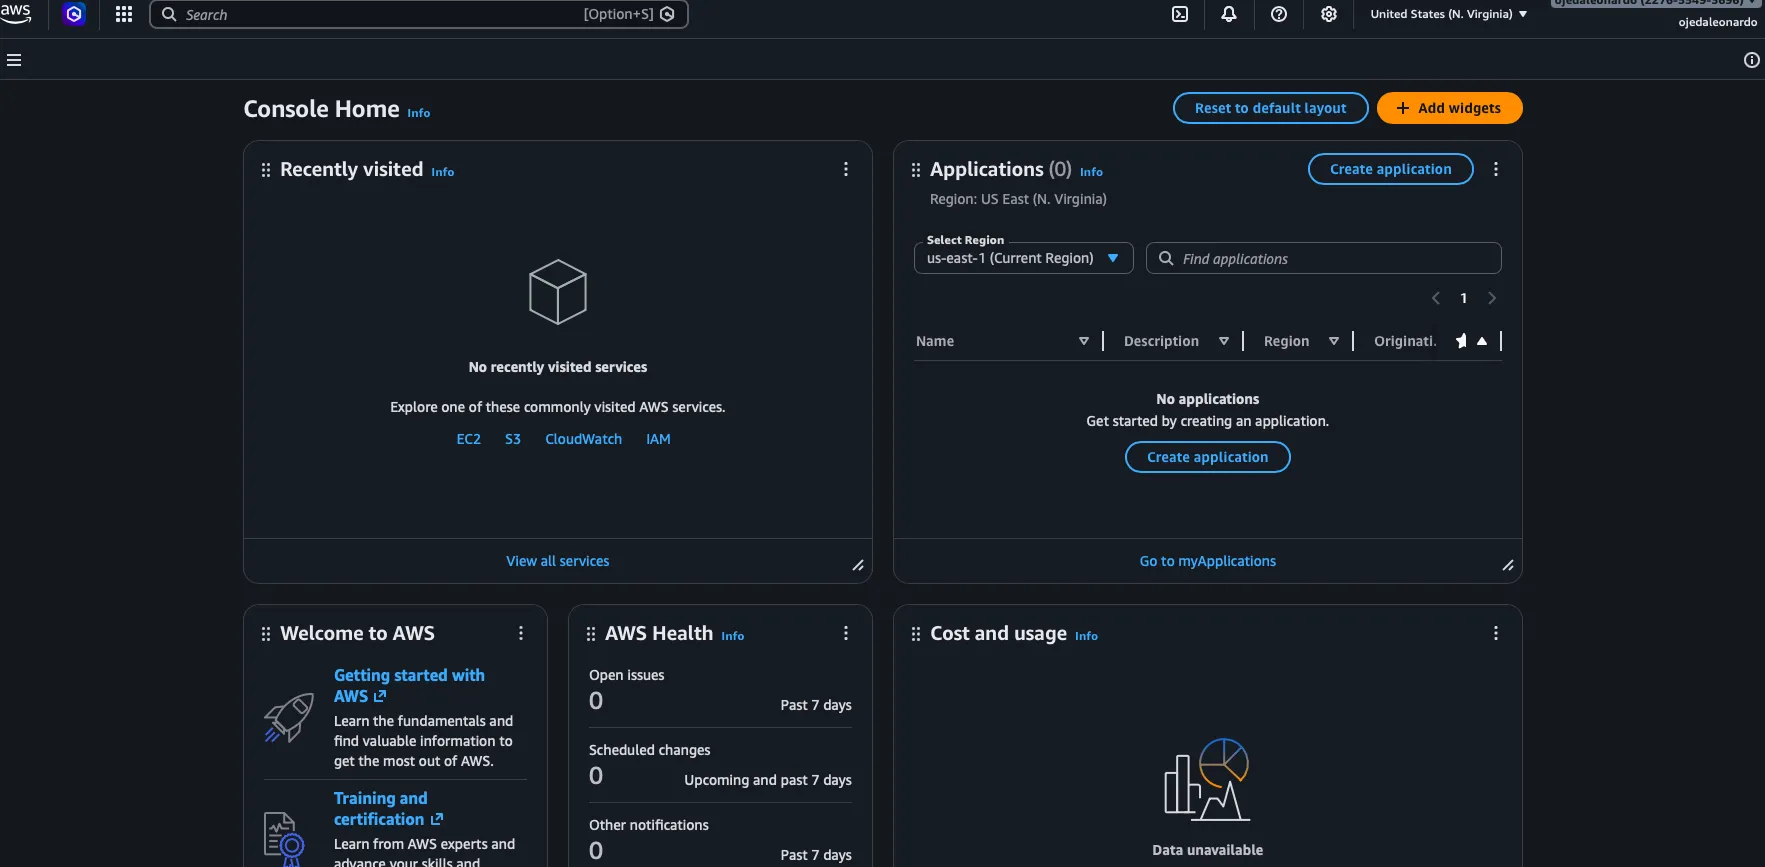
Step 8: Welcome to the AWS Console
Once all steps are completed, we now have access to the AWS Management Console. From here, we can explore and start using the more than 240 services the platform offers.
Conclusions
Creating an AWS account is a simple process that takes no more than 10 minutes. With the Free Tier, we have 6 months to learn and experiment with services like EC2, S3, Lambda, RDS, and many more at no cost, plus up to $200 USD in credits to explore the platform.
In the upcoming posts, we’ll see how to secure this account following security best practices, such as enabling MFA on the root user and creating IAM users instead of using the root user for everything.