We’ve already created our account, secured it, understand IAM, and taken our first steps with S3. But before continuing to experiment with more services, there’s something fundamental we need to configure: cost alerts. AWS works on a pay-per-use model, and if we’re not paying attention, we might get a surprise on our bill at the end of the month. In this post, we’ll configure AWS Budgets to keep everything under control.
Why is cost control important?
AWS has hundreds of services, and many of them generate costs even when we’re not actively using them. Some common examples of unexpected costs:
- An EC2 instance we left running and forgot to shut down.
- An S3 bucket with data that grows without us noticing.
- An Elastic IP not associated with any instance (yes, that has a cost).
- Data transfer between regions.
AWS’s Free Tier gives us a cushion for the first 12 months, but it has limits. AWS Budgets allows us to create alerts to notify us before we spend more than we want.
What is AWS Budgets?
AWS Budgets is a service that allows creating custom budgets and receiving alerts when costs (or usage) approach or exceed the amount we define. It’s free for the first two budgets, and from the third one onwards it costs $0.02 USD per day per budget.
With AWS Budgets we can:
- Define a maximum monthly spending amount.
- Receive email alerts when we reach a percentage of the budget.
- Monitor actual costs (what we’ve already spent) and forecasted costs (what AWS estimates we’ll spend by the end of the month).
Step 1: Access AWS Budgets
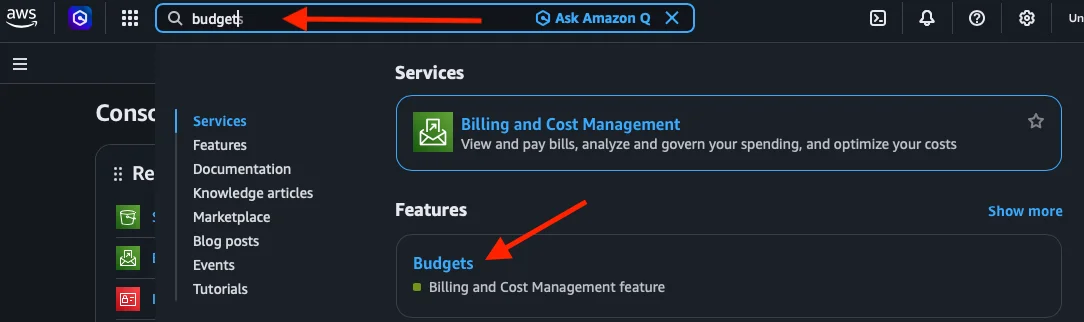
From the AWS console, we search for Budgets in the top search bar and click on the result. This takes us to the AWS Billing and Cost Management panel.
Step 2: Create a budget
On the Budgets screen, we click Create a budget.

Step 3: Choose the budget type
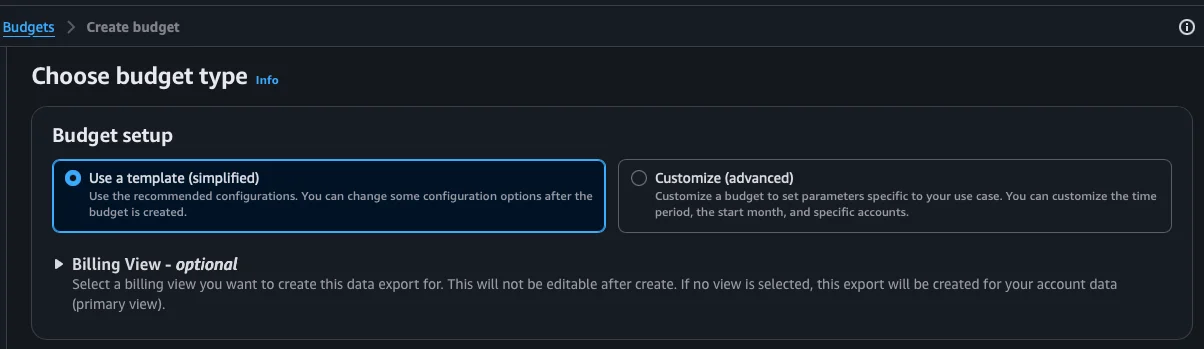
AWS offers two ways to create a budget:
- Use a template (simplified): predefined templates that AWS recommends for the most common use cases. It’s the ideal option to get started.
- Customize (advanced): for more specific configurations with custom periods, accounts, and filters.
We select Use a template (simplified).
Step 4: Configure the budget
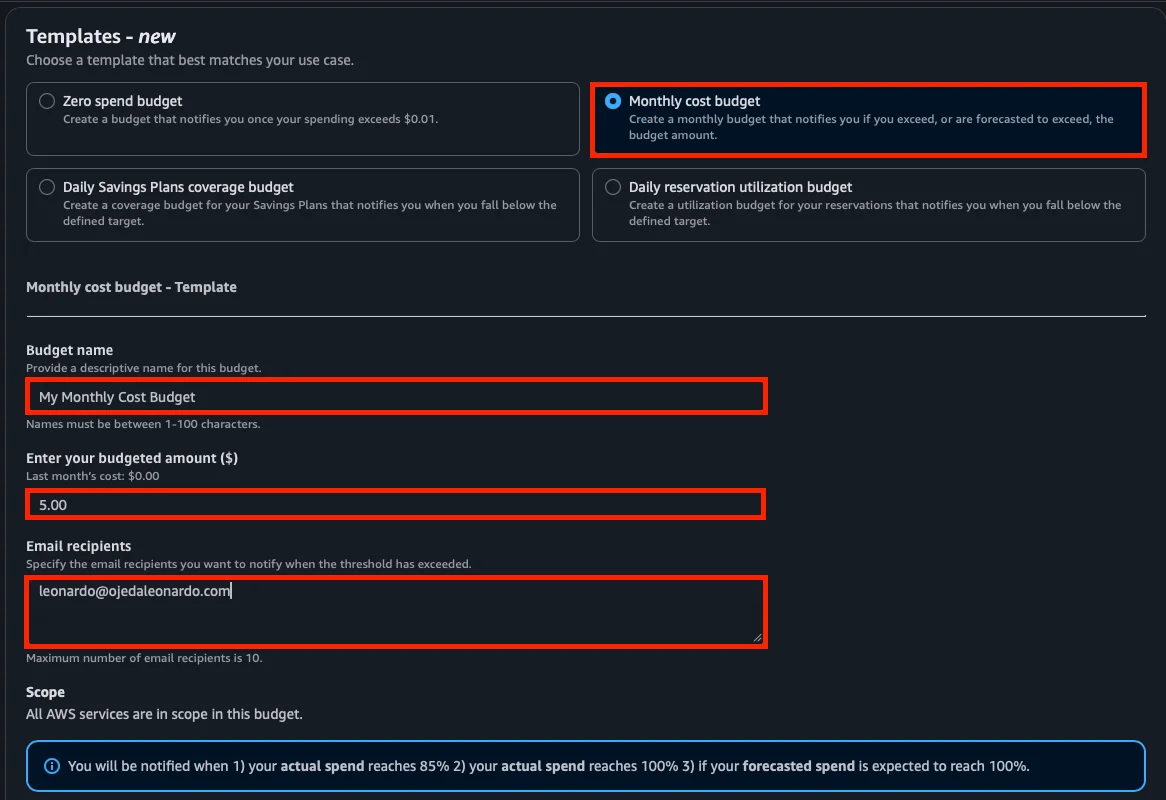
Below, the available templates appear. We have four options:
- Zero spend budget: notifies us of any spending above $0.01. Ideal if we’re within the Free Tier and don’t want to spend anything.
- Monthly cost budget: allows us to define a maximum monthly amount. This is the one we’ll use.
- Daily Savings Plans coverage budget and Daily reservation utilization budget: these are for more advanced cases we don’t need right now.
We select Monthly cost budget and fill in the details:
- Budget name: we leave the default name
My Monthly Cost Budgetor give it a descriptive one. - Enter your budgeted amount ($): the maximum monthly amount we want to monitor (for example,
5.00USD). This is not a hard limit — AWS will not shut down services when we reach this amount, it will only notify us. - Email recipients: the email address where we want to receive alerts.
Below we can see a summary of the alerts that will be configured automatically: it notifies us when actual spending reaches 85%, when it reaches 100%, and when forecasted spending exceeds 100%.
Important: AWS Budgets does not stop services when the budget is reached. It only sends notifications. If we want automatic cutoff, we would need to configure additional actions with AWS Lambda or Service Control Policies, which is beyond the scope of this post.
Step 5: Create the budget
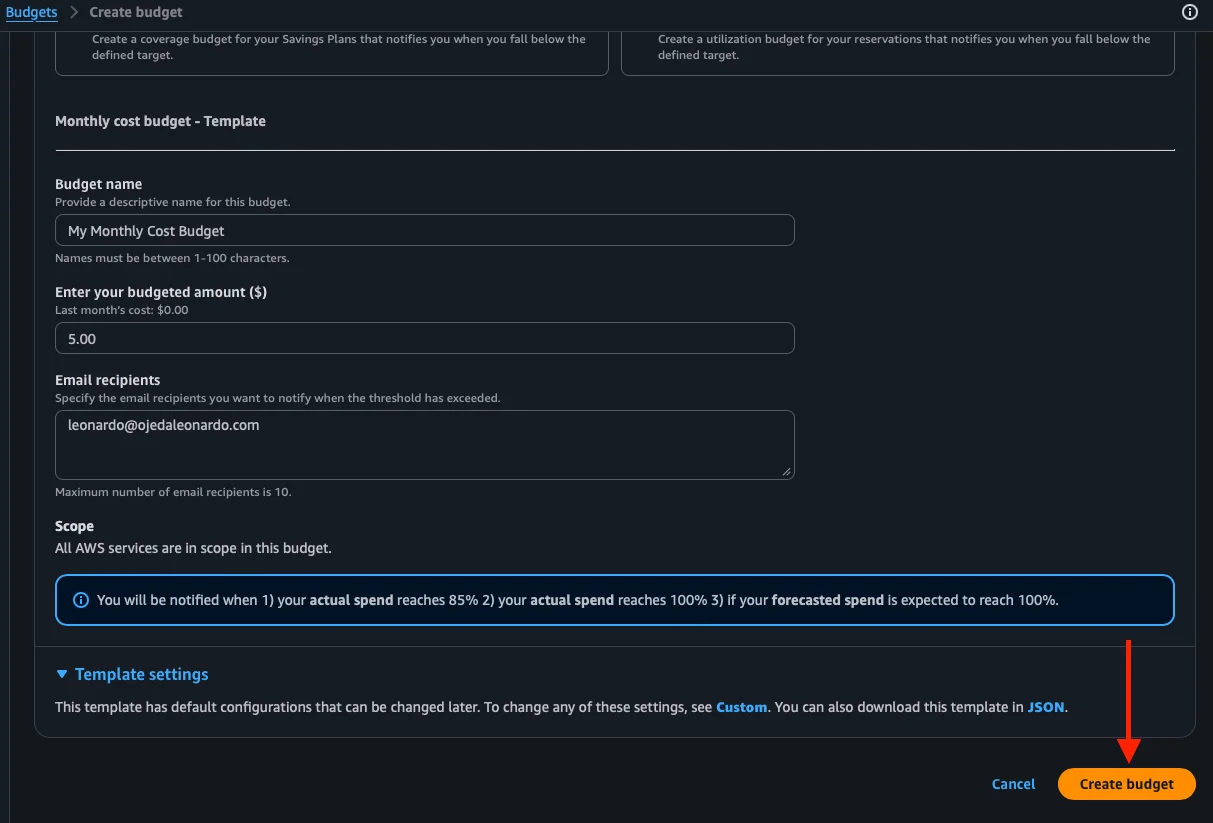
We verify everything is correct. In the Template settings section we can see the default configurations that can be modified later. We click Create budget.
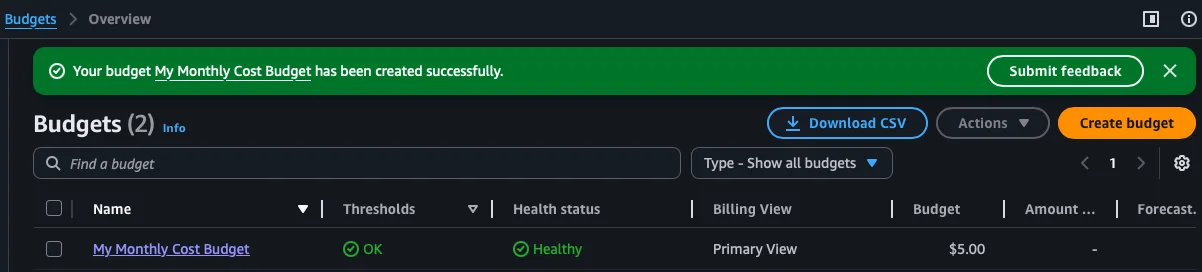
Done, our budget is created. AWS shows us the confirmation message and we can see the budget in the list with its OK status, Healthy health, and the amount of $5.00.
Step 6: Explore the budget details
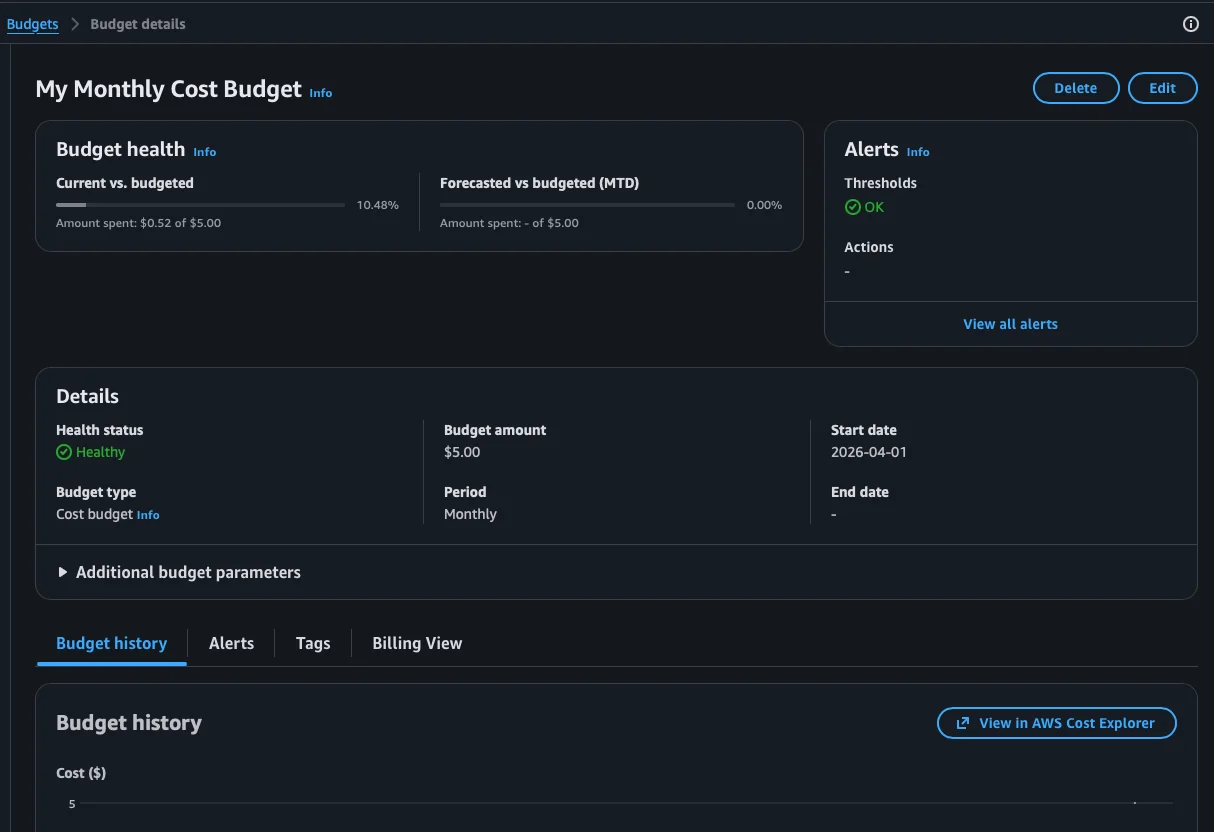
If we click on the budget name, we can see the full details:
- Budget health: shows the current spending percentage vs. the budget (in our case, $0.52 of $5.00, or 10.48%) and the forecasted spending for the month.
- Alerts: the status of configured alerts. As long as everything is green (OK), we’re within budget.
- Details: budget information such as type (Cost budget), period (Monthly), start date, and amount.
- Budget history: a visual history of costs month by month, with the option to view it in AWS Cost Explorer for more detailed analysis.
Tip: Check this panel periodically to see how your costs are going. You can also access the Free Tier panel from Billing and Cost Management to see exactly how much of each free service you’re using and whether you’re close to exceeding the limits.
Extra: Zero Spend Budget
If you’re within the first 12 months and don’t want to spend anything at all, you can create a second budget using the Zero spend budget template. This budget alerts you about any spending, no matter how small. It’s the best way to detect if something we did generated an unexpected cost.
Remember that the first two budgets are free, so you can have both the Monthly cost budget and the Zero spend budget at no additional cost.
Cost best practices
Now that we have alerts configured, some best practices to keep costs under control:
- Delete what you don’t use: if you’re done testing a service, delete the resources. Stopped EC2 instances, S3 buckets with data, unused Elastic IPs — everything can generate costs.
- Use the Free Tier to your advantage: many services have a generous free tier. Check the limits at aws.amazon.com/free.
- Check the regions: some services have different prices depending on the region.
us-east-1is usually one of the most affordable. - Tag your resources: tags allow organizing and filtering costs by project, environment, team, etc. It’s a practice worth adopting from the beginning.
Conclusions
In this post we configured AWS Budgets to receive cost alerts and explored the billing tools AWS offers. This is essential before continuing to experiment with more services: having visibility into what we spend gives us peace of mind and allows us to learn without surprises.
In the next post, we’ll explore new AWS services, now with the confidence that we have our costs under control.